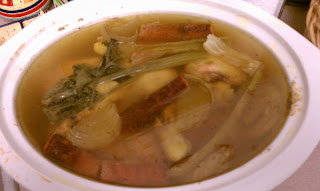
Why start with soups? Great question! Meal planning has always been a big part of our world since the beginning of our marriage. As I’ve mentioned in the past we have both always worked full time jobs and gone to school full time for the last almost 10 years now. So without some intentional planning we would be eating out almost every meal. A revelation about my husband early in our marriage was his absolute love for soups. I didn’t really grow up eating too many homemade soups outside of the frequent pot of “Yankee” chili during the cold Ohio winters. So as a new wife I began to learn and love soups. A big pot of soup will usually have between 8-10 servings and this translates in our family of 2 into 4-5 meals. My soup journey began with making a big pot every Sunday evening along with preparing a normal meal. The soup wouldn’t be eaten then but was in preparation for our week. It allowed for several easy, hot, healthy, homemade, and convenient meals and has become part of our repertoire since then.
Ok, on with the food. I am going to share how I prepare a basic Chicken broth. I am going to use this broth in the three soup recipes that I will share with you soon. I choose the make the broth over buying it in the box for three reasons: 1. I save money, 2. Homemade has much better flavor, 3. Homemade allows me to control how much fat & sodium are in my soup. When preparing a chicken broth you have the liberty to add many different ingredients to enhance the flavor. As I will be using this in three totally different flavors of soups I am keeping it very basic and simple and will be adding more “flavoring” agents directly to each individual soup recipe. Please note it is best if you are planning to make a soup that you prepare this broth at least one day in advance.
To begin you will need the following:-A large stock pot or crock pot to cook it in. Size should be enough for your meat, veggies, and at least 8-10 cups of water. The larger the pot the more broth you will make.
-As for the chicken I am using a family size package of chicken leg quarters because they were only $0.88 a pound. I will also use a whole chicken, chicken thighs, or split chicken breast depending what is on sale.
-3 chicken bouillon cubes, 8-10 cups of water. This is where some of my sodium control comes in. Adding bouillon cubes will enhance the flavor of the broth and will be the only salt item that I add. With a pot this size I use 3 cube of this brand.
So now that we have all the players in place let’s begin with putting ½ of the veggies in the bottom of the pot. One of my planning tools also including my well worn crock pot. I have set this to cook Sunday morning while we are at church and I can leisurely complete the process later this afternoon. If you don’t have a crock pot the same process is easily done with a large stock pot on the stove and we’ll get to more on that in a bit.
Next I will rinse and trim the chicken. I am only trimming the huge chucks of fat (pictured on the left side of my cutting board) that are visible on the back of the leg quarter. After this has cooked I have a great trick to share that will easily remove all the remaining fat from the broth. Again this doesn’t need to be a fussy process.
Next add the chicken to the crock pot
Next add the remaining veggies over the top of the chicken so that all the chicken gets exposure to our flavoring agents. Crumble the bouillon cubes and add water till you reach the top of the pot.
This is the most efficient way that I have found to remove the fat from a homemade chicken broth. That leaves you with a beautiful, rich, flavorful broth that is practically 100% fat free. Check out the before & after below


YUM! How soon before you post the recipes????
ReplyDeleteI love soups or other one-pot meals but have always used the canned broth. Will try this VERY soon. Thanks for sharing Jennifer. BTW, I joined weight watchers so perfect timing for this broth.
ReplyDelete